Welcome, Commander!
Learn To Race
There's a lot to learn about Rocket Dogs, but don't worry - we'll start with the basics. Explore the sections below to get up-to-speed in your new role as a Commander so you and your canine companion can hit the racecourse and claim sweet victory in no time!
Game Interface
The Game Interface is your command center. You'll use it to execute your role as a Commander while your Rocket Dog is on the racecourse.
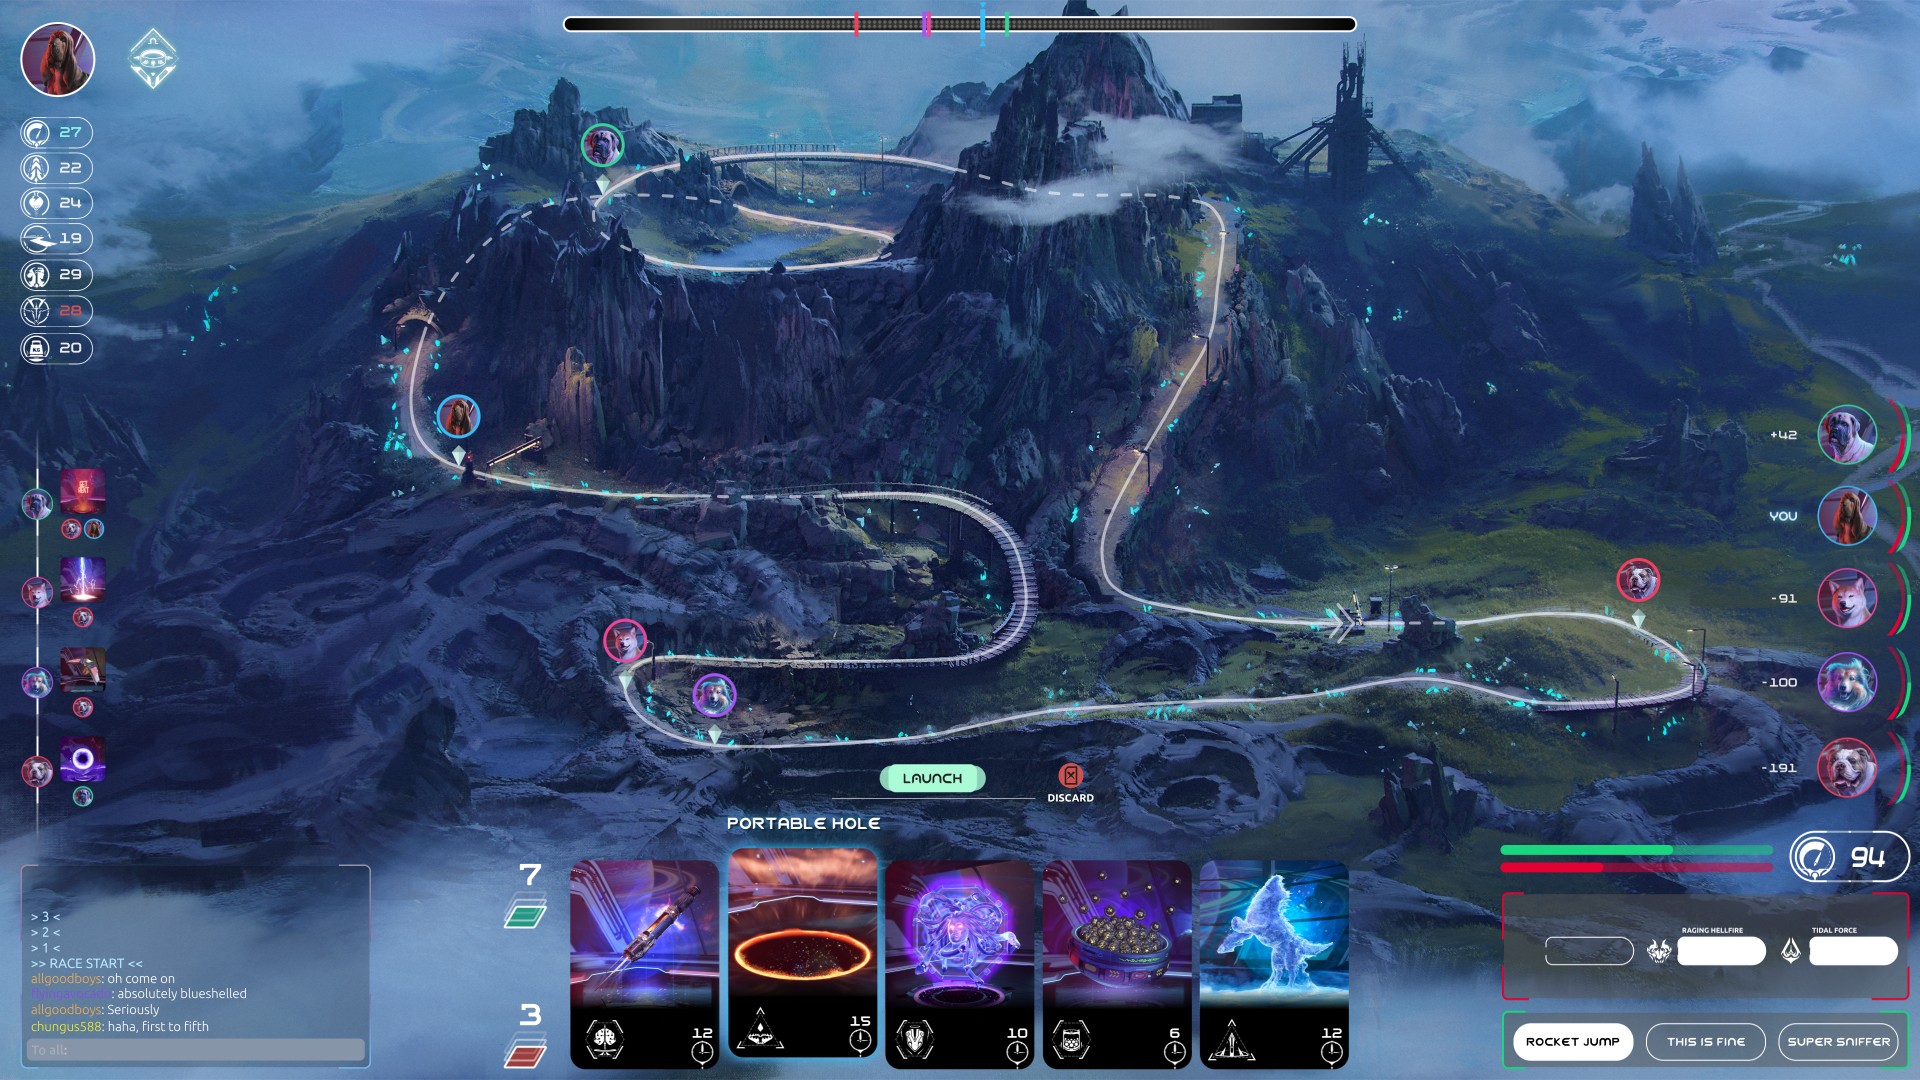
Game Interface
Your Browser
Racecourse
Rocket Dogs race in diverse locations across the Aluza System. From the dusty sands of Exosol to the city streets of Quantum Prime, each racecourse features terrain and environments that are as unique as the Dogs themselves.
Looped Racecourses
In Looped racecourses, the Start and Finish Line are the same. Your race distance and type will determine the number of laps your Dog will run. Complete the number of designated laps faster than your competition to win!
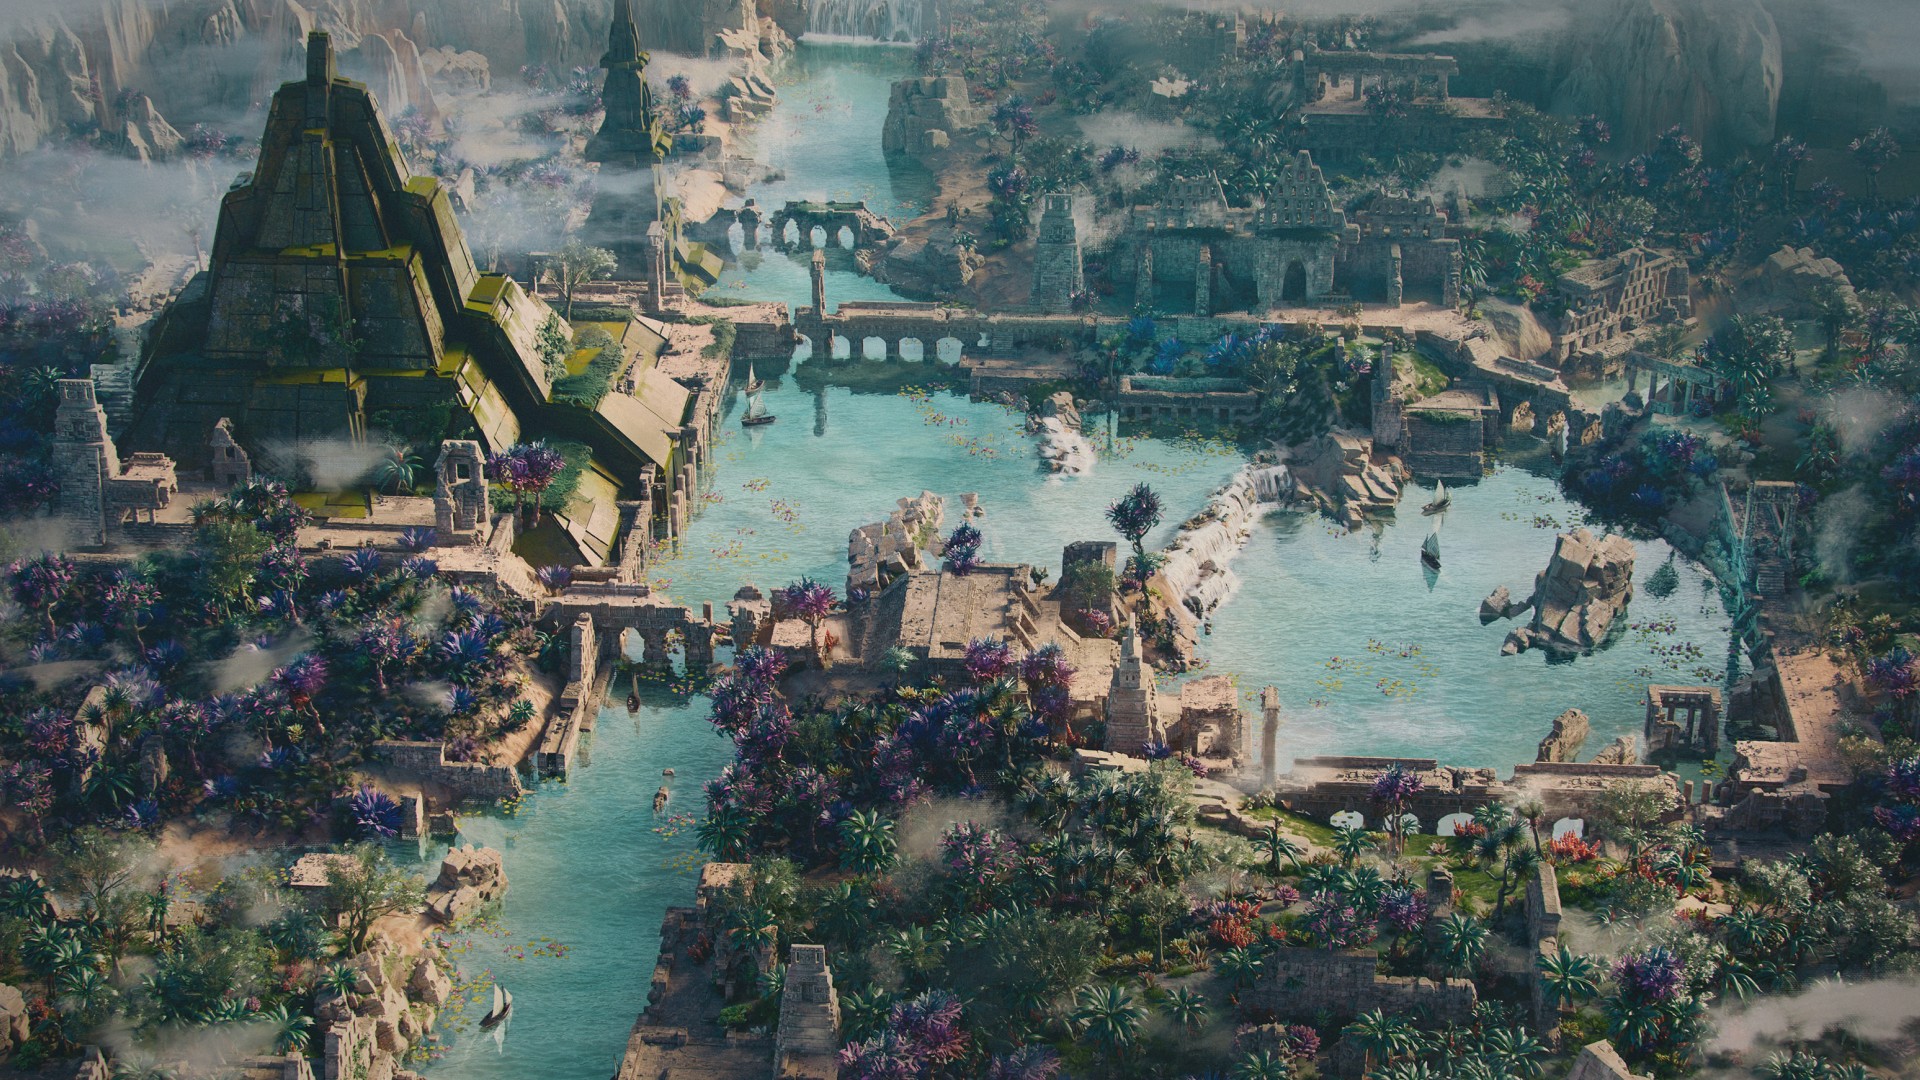
Lukona - Temple Ruins
Racecourse
Point-to-Point Racecourses
Some racecourses are Point-to-Point. There are no laps, just one straight shot - the first Dog to reach the Finish Line wins!
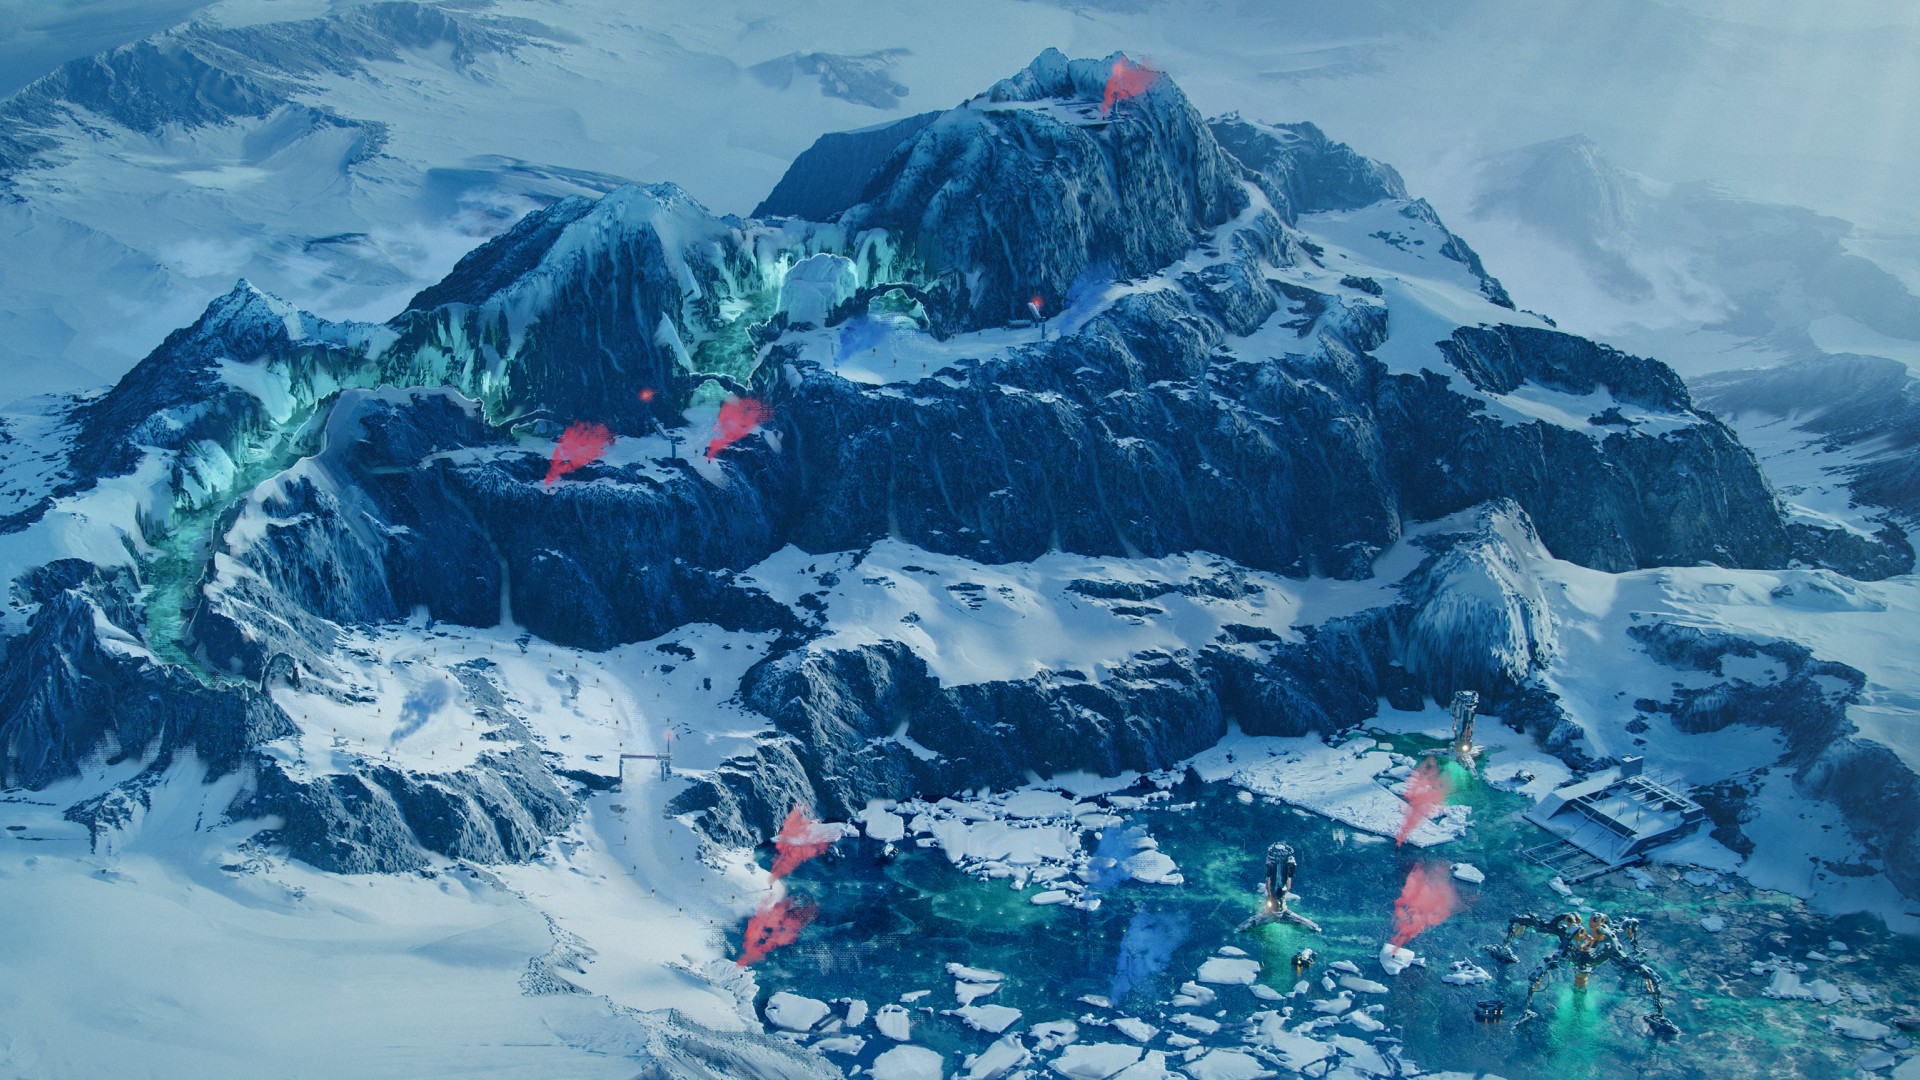
Polar Paradise - Hamarki Peak
Racecourse
Progress Bar
Each race's total distance is represented by the progress bar, showing your Dog's current completion of the total race distance. Sprint races have a shorter total race distance than Enduro races.
Progress Bar
Game Interface
Dog Avatars & Positions
Each Dog that competes in a race is represented by an avatar throughout the game interface. The real-time position of every Dog in the race is shown on the map using their avatars.
- Your Dog's avatar will always be outlined in Blue.
- Opponent Dog avatars are outlined in one of four other colors: Pink, Red, Purple, and Green. These colors will remain the same throughout the race.
- Every time a Dog's avatar appears, it will always be outlined with its designated color. This way, you'll quickly be able to identify an opponent to seek revenge for the last Attack they hit your Dog with!
Blue
You
Pink
Player 2
Red
Player 3
Purple
Player 4
Green
Player 5
Dog Conditions
During the race, Dogs may be affected by an array of Conditions (Trapped, Silenced, Stunned, Slowed, Heavy, Distracted, or Shielded) that affect them for a short period of time.
When your Dog is affected by a Condition, the Condition will appear as a unique avatar element on your Game Interface. You can monitor a Dog's Condition in real-time, including the Conditions of opponent Dogs!

Trapped
Condition

Silenced
Condition

Stunned
Condition

Slowed
Condition

Heavy
Condition

Distracted
Condition

Shielded
Condition
Leaderboard
The Leaderboard ranks the real-time position of all Dogs in the race. You'll see the relative position of each Dog (indicating their proximity to you!) to the left of each Dog avatar. You can also consult the Leaderboard to monitor each opponent's Dog's Condition, Heat, and Energy levels in real-time. Use the Leaderboard to decide exactly when to strike your rivals with an Attack!
Leaderboard
Game Interface
Trap Positions
The position of any Traps you can see are shown on the map.
- You can always see your Traps, which are indicated on the map in Green.
- You won't be able to see your opponent's Traps until after your Dog has either perceived them or been caught by one of them. They'll appear on the map in Red when your Dog detects them.
Your Trap
Game Interface
Opponent's Trap
Game Interface
Your Dog's Stats
Monitor your Dog's stats in real-time! During the race, you'll be able to keep an eye on stats like Speed, Acceleration, Endurance, Agility, Will, Perception, and Capacity. Make sure to quickly glance at these often: your Dog's stats may change throughout the race based on the abilities or effects currently impacting your Dog.

Your Dog's Stats
Game Interface
Your Equipment
To access an overview of the Rocket and Gear you've outfitted your Dog with, click here to toggle your Equipment panel. Hover over each piece of Equipment to see how it affects your Dog (and the Dogs around them.)
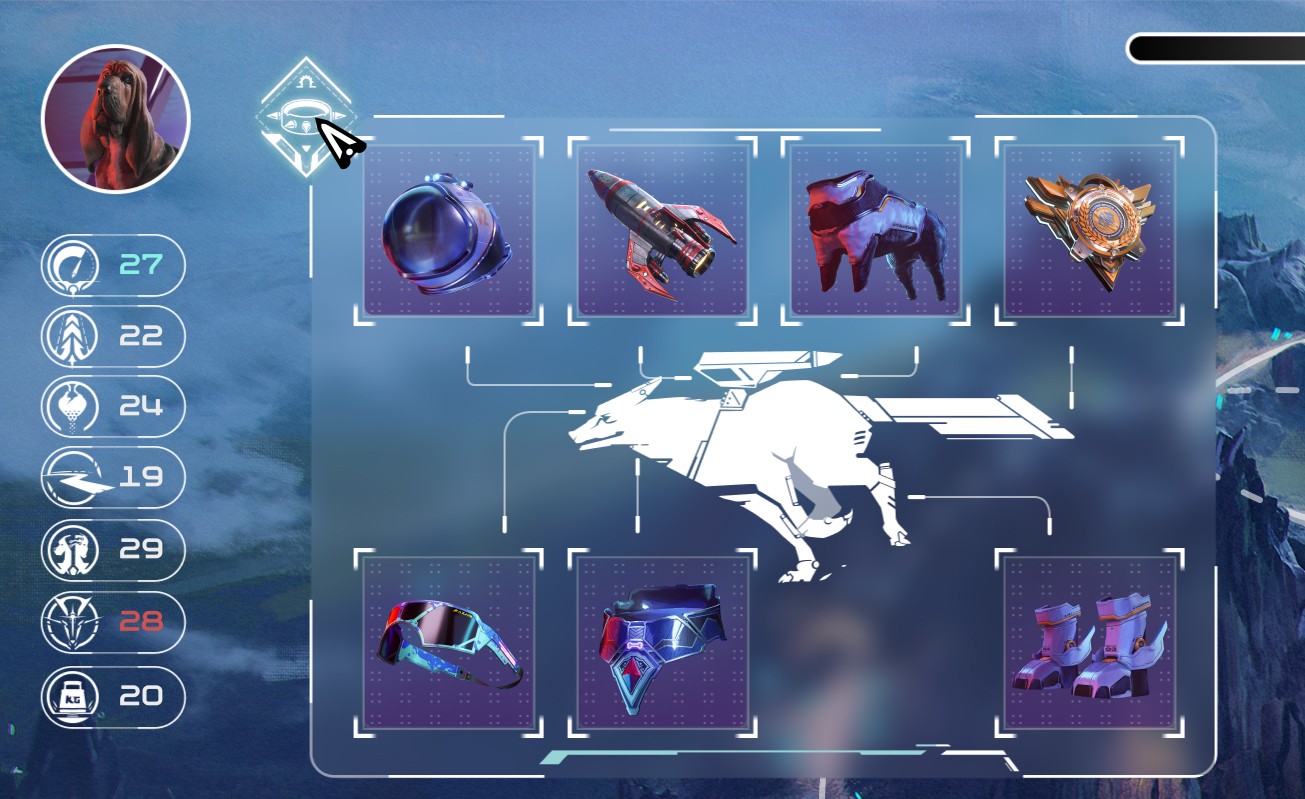
Your Dog's Equipment
Game Interface
Opponent Dogs
Curious about who your Dog is up against? Click an opponent's Dog avatar in the Leaderboard to view their stats, and click the Gear icon to peek at their Rocket and Gear setup.
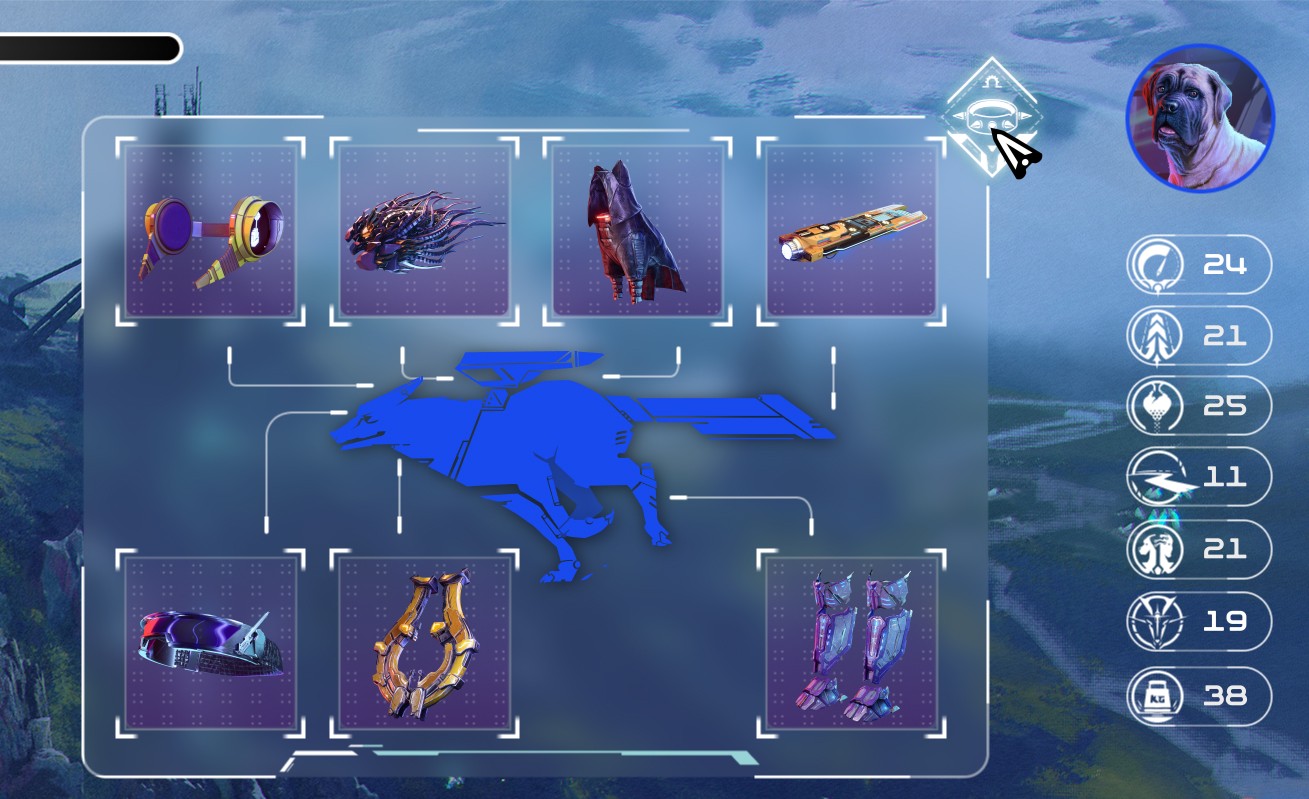
Opponents' Equipment
Your Browser
Click on the Dog's avatar in the opponent Dog's panel to collapse it when you're ready to get back to watching the race unfold - you don't want to spend too much time meta-gaming mid-race!
Dashboard
Your Dashboard is a critical component of the game interface. Use it to keep an eye on the vital stats of your Dog and its Rocket in real-time.
Dashboard
Game Interface
Speed Gauge
Unleash the zoomies! The Speed Gauge indicates your Dog's real-time running Speed on the course.
Speed Gauge
Game Interface
Energy Meter
The Energy Meter displays your Dog's current Energy level. The dark green section on the meter is this race's Reserve Limit. If your Dog's Energy falls below the Reserve Limit, they'll begin to run slower and won't be able to avoid incoming Attacks as effectively.
Energy Meter
Game Interface
It's always a good idea to include some Treats in your Strategy Deck to restore your Dog's Energy, especially in the crucial moments of a race!
Heat Meter
Boosting generates Heat! Your Rocket gains Heat while Boosting and cools down when it's not Boosting.
Your Heat Meter displays your Rocket's current Heat level. If your Rocket's Heat is above 100%, your Heat Meter will begin to turn black. When this happens, you're at serious risk of overheating your Rocket, which will disable it for the rest of the race - no more Boosts for you! Use caution when employing excessive Boosting, as if your Rocket is disabled, your Dog will also lose any benefits or effects from its ability.
Heat Meter
Game Interface
Experienced Commanders know that sometimes, they must test their Rocket's limits to snatch victory away from an opponent. Your Heat strategy is yours to decide!
Fuel Tanks & Rocket Fuel
Every Rocket has one or more Fuel Tanks, up to a maximum of six. To Rocket Boost, you must first load a Rocket Fuel into one of your Fuel Tanks by playing a Rocket Fuel from your Hand. It will occupy the first empty Fuel Tank. If you have no empty Fuel Tanks, you cannot play any more Rocket Fuel from your Hand.
Fuel Tanks & Rocket Fuel
Game Interface
Rocket Boosting
Each Rocket Fuel has a unique ability, allowing you to strategically choose the best Rocket Fuel to Boost with every time! To activate a Rocket Boost, click on the Fuel Tank containing the Rocket Fuel you want to Boost with. Generally, you can only activate one Rocket Boost at a time.
While you're Boosting, the chosen Rocket Fuel will begin to deplete from its Fuel Tank. At any time while you're Boosting, you can click on the Rocket Fuel you're Boosting with to immediately Terminate the Rocket Boost and empty the remaining Rocket Fuel from its Fuel Tank.
Dog Skills
Your Dog's Skills can be used and monitored from this Skills panel. Your Active Skills are the skills you can choose to use at any time when they're available. Click on any Active Skill to use it at the perfect moment during a Race!
-
After you use an Active Skill, it'll turn from available to unavailable.
-
Multi-use Active Skills, which can be used more than once in a race, will turn unavailable during a brief Cooldown, ready to be used again once they return to available.
-
Your Passive Skills are used automatically by your Dog, once the conditions are met for the Skill to take effect.
Hover over your Dog's Skills to review their specific abilities at any time.
Skills Bar
Game Interface
Hand
The Hand is where players keep Items available for use during a race. Items are moved to your Hand once drawn from your Strategy Deck. The maximum number of Items you can hold in your Hand at any time is 7, and you can play these Items any time you are not on Cooldown. Whenever you play or discard an Item from your Hand, the game will immediately draw the next Item for you from your Strategy Deck until it's empty.
Some in-game effects and abilities allow you to draw additional Items to quickly build up your Hand size. Explore a wide array of combinations to find the best strategy for your Dog!
-
Cooldown - The Cooldown of an Item is the length of time you'll be on Cooldown for after playing that specific Item. During a Cooldown, you cannot play any additional Items until the Cooldown is over: to designate this, a Cooldown icon with a countdown timer will appear. You can check the timer to see how much time remains before you can use your next Item.
-
Subtype - The subtype Icon of the Item allows you to quickly remember the type of ability or effect the Item has.
-
Hover - Hover over an Item for a refresher on the Item's exact ability.
-
Starting Hand - During the countdown before your Race begins, the game will shuffle all Items in your Strategy Deck and automatically draw you a Starting Hand of Items. The starting number of Items drawn into your Starting Hand is determined by your Dog's Breed, and ranges from 2 to 4 Items.
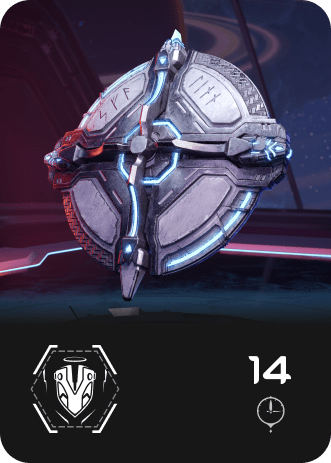
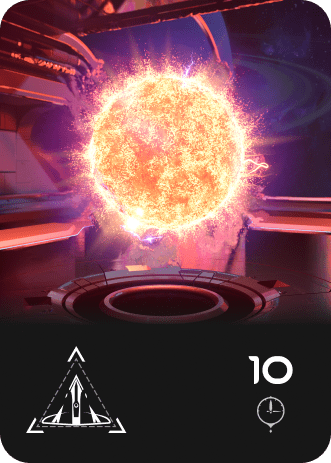
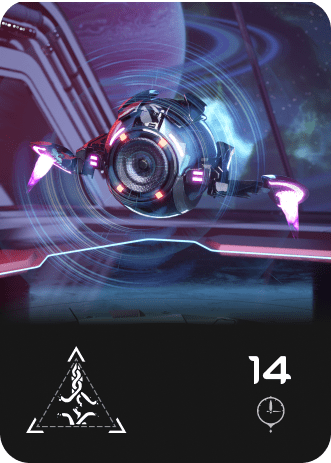
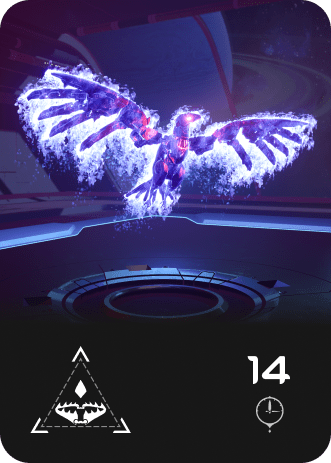
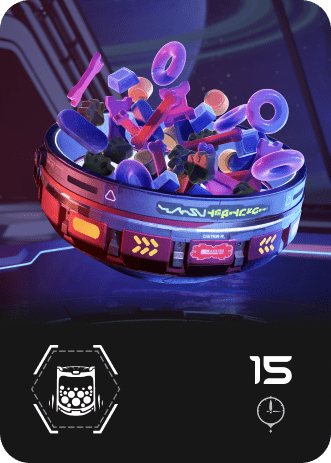
Hand
Game Interface
Stay alert! Once your Strategy Deck is empty, you'll have no more Items for the rest of the race. Strategic management of your Items is crucial to becoming a great Commander!
Deck
All shuffled Items yet to be drawn will remain in your Strategy Deck. You can check the number of Items remaining in your Strategy Deck at any time.
Deck
Game Interface
Discard Pile
Items that you have played or discarded will be moved to the Discard Pile after they are used. Here, you can see the total number of Items you have played so far in your current Race. Clicking on the Discard Pile Icon will reveal played Items in their chronological order from Left to Right. Hovering over any Item in the Discard Pile will remind you of its abilities.
Discard Pile
Game Interface
Playing Items
Select Item: Click on an Item to select it. Selecting an Item will highlight it and display its Item Name and the Play Panel above the Item.
Playing Non-Targetable Items: Non-Targetable Items do not require a choice of whom, what, or where is affected when playing the Item's ability. Instead, these Items automatically determine whom, what, or where is affected, such as determined by an opponent's position or rank, or automatically affecting your own Dog, if you're giving them a Treat!
To play these Items, click Launch while the Item is selected. The Item's ability will immediately take effect, the Item will be placed in your Discard Pile - no further action needed from you! - and you will draw a new Item from your Strategy Deck, unless it's empty.
Playing a Targetable Item: Targetable Items invite you to freely select a Target or make a choice between several, such as choosing which opponent to use your Item against. Your available choices are called Potential Targets. Targetable Items have a Target List where you usually find the Launch button, which lists the Potential Targets you can choose to be affected by the Item's ability.
To play these Items, click on your chosen Target from the Target List while the Item is selected. The Item's ability will immediately take effect on the chosen Target, the Item will be placed in your Discard Pile, and you will draw a new Item from your Strategy Deck, unless it's empty.
Discard Item: Click on the Discard Button to discard an Item from your hand. It will immediately move to your Discard Pile without activating its ability, and you will draw a new Item from your Strategy Deck to replace it, unless it's empty. But discard carefully! Discarding any Item causes a 5-second Cooldown.
Deselect Item: Click on an Item again while it's selected to deselect it. Deselecting an Item will unhighlight it, collapsing the Item's Name and Play Panel.
Hand
Game Interface
Attack Log
Sometimes, an opponent executes a strategy that unexpectedly moves you from the lead to the back! The Attack Log will inform you on whom you need to seek revenge on for messing with your Rocket Dog!
Attack: Each Attack played by any Commander in your race will appear in the Attack Log. Hovering over the Attack will explain its ability.
Attack Owner: The owner of each Attack put into play is indicated in the Log by their Dog's avatar.
Affected Players: The Dog avatars of any players or their Dogs affected by an Attack are shown underneath the Attack. If no players or Dogs were affected by the Attack, no Dog avatars will appear beneath the Attack.
Your Traps: When an opponent's Dog is caught in your Trap, that Trap will appear in the Attack Log and display the opponent's Dog that was Trapped. Instead of displaying your Dog's avatar as the Attack Owner, your Attack Log shows how many Charges remain on the Trap before it will disappear from the racecourse. The final Charge will display as 0. This signifies that the Trap has used all its Charges and has now been removed from the racecourse.
Opponent Traps: Tread carefully! You will only see your opponent's Traps in the Attack Log once you or another Dog become Trapped in them. Information like remaining Charges is only visible to the Commander that deployed the Trap. You can only see the Trap's position on the racecourse if your Dog has either been Trapped by it, successfully avoided it, or has perceived it while racing.

Attack Log
Game Interface
Chat
The Chat window is a message log between you and the other Commanders in your race! Here, you can get to know your competitors, discuss the weather, and say good game (GG!) after the race. It's all in good fun, after all.
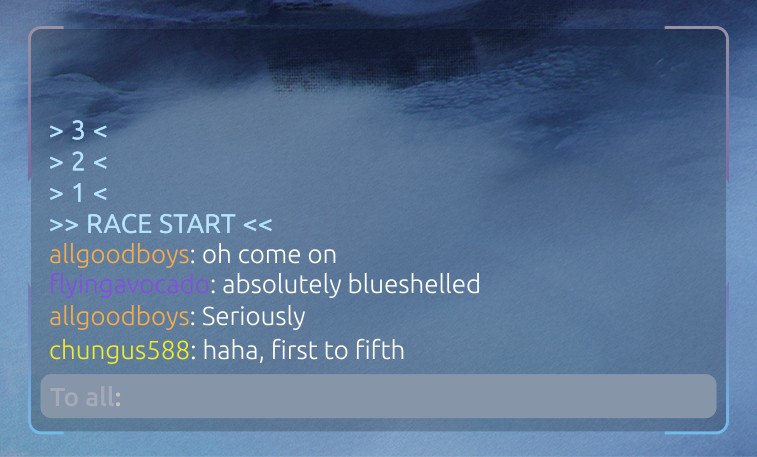
Chat Window
Game Interface
Race Formats
Every race is designated by a format that dictates the rules, location, distance, and other variations of the race. Try your hand at several to determine the ideal Dog for the job, and the best strategy to lead your Rocket Dog to victory!
Loadout Rules
Every race uses a specific set of Loadout Rules that dictate how you will build your Loadout. Game Master Katiki has a variety of crazy Loadout Rules variants for the experienced Commander who dreams of chasing the chaos of Rocket Dogs unleashed!
Racecourse
From The Streets on Quantum Prime to Mount Vulkan on Proxima Twilight, every race will take place on a specific racecourse, each unique in appearance, terrain, and configuration.
Course Configuration
Every race has a Course Configuration, which is a course specific combination of the following variables:
- Course Direction - The direction Dogs will race through the course. For Looped Courses, this is Clockwise or Counterclockwise. For Point-to-Point Courses, this is Normal, Reverse, or Out and Back.
- Distance - The total number of laps through the racecourse for Looped Courses. Different distances call for different strategies: Sprint Distance races are fast and furious with fewer laps than Enduro Distance races, where Dogs must pace themselves for a longer race!
Preorder Today!
There you have it, the basics of racing with your favorite furry companion in Rocket Dogs! The only thing to do now is to Preorder Genesis Set NFTs so you're ready to race on Launch Day!
Preorder Now!
